Chocolate Strawberry Cheesecake
Few desserts can match the elegance and indulgence of a chocolate strawberry cheesecake. With its combination of rich chocolate, fresh strawberries, and creamy cheesecake filling, this no-bake treat is as beautiful as it is delicious. Whether you’re celebrating a special occasion or simply treating yourself to something sweet, this dessert offers the perfect balance of decadence and freshness.
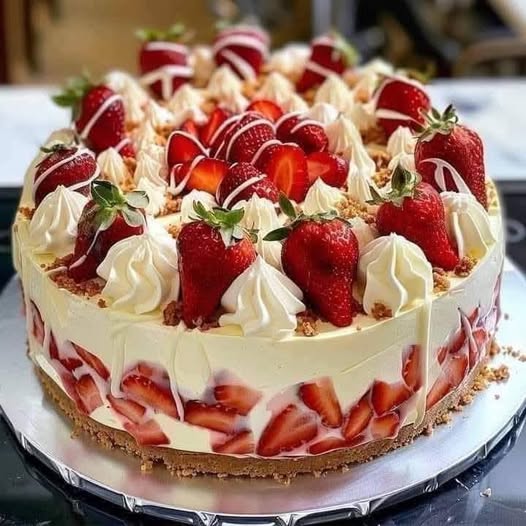
This recipe features a chocolatey twist on the classic cheesecake, incorporating a luscious chocolate biscuit crust, a light yet rich cream cheese filling, and a crown of juicy, halved strawberries. While the use of gelatin is optional, it adds firmness and structure, making the cheesecake easier to slice and serve, especially in warm weather.
What sets this cheesecake apart is the harmony of flavors: the crunch of the chocolate crust, the creamy vanilla and lemon-infused filling, and the natural sweetness of strawberries. It’s easy to prepare, requires no baking, and can be made ahead of time—making it perfect for entertaining or gifting.
Let’s walk through how to make this stunning dessert from start to finish, along with tips for perfect texture, creative variations, and serving suggestions.
Ingredients
This recipe consists of three main parts: the crust, the filling, and the strawberry topping.
For the crust:
- 200g crushed digestive biscuits or graham crackers (about 2 cups)
- 100g melted butter (about 1/2 cup)
For the filling:
- 500g cream cheese, softened (about 2 cups)
- 300ml cold heavy cream or whipping cream (about 1¼ cups)
- 100g sugar (about 1/2 cup)
- 1 teaspoon vanilla extract
- 1 tablespoon lemon juice
- 10g gelatin + 4 tablespoons warm water (optional, for firmness)
For the topping:
- 300g fresh strawberries, halved (about 2 cups)
Instructions
Step 1: Prepare the crust
Begin by crushing the digestive biscuits or graham crackers until fine. You can use a food processor for ease, or place the biscuits in a zip-lock bag and crush them using a rolling pin.
Once the crumbs are finely ground, transfer them to a bowl and stir in the melted butter. Mix well until the crumbs are evenly coated and resemble moist sand.
Pour the mixture into a 9-inch (23 cm) springform pan or pie dish. Press it down firmly using the bottom of a measuring cup or a glass to form a smooth, compact base. Ensure the base is evenly spread, and press some of the mixture slightly up the sides for a finished look.
Refrigerate the crust for 20–30 minutes while preparing the filling. This helps it firm up and prevents it from mixing with the filling later on.
Step 2: Make the cheesecake filling
In a large mixing bowl, combine the softened cream cheese and sugar. Beat with an electric mixer until smooth and creamy. It’s essential to work with softened cream cheese to avoid lumps.
Add the vanilla extract and lemon juice, then mix again until fully incorporated. The lemon juice provides a slight tang that brightens the flavor and balances the richness of the cream cheese.
In a separate bowl, whip the cold heavy cream until soft peaks form. Be careful not to overwhip—soft peaks are ideal for folding into the cheesecake mixture.
If you are using gelatin for a firmer cheesecake, dissolve 10g of gelatin in 4 tablespoons of warm water. Stir until completely dissolved and slightly cooled, then gradually add it to the cream cheese mixture while mixing continuously. Gelatin adds stability, especially helpful if you’re serving the cheesecake on a warm day or if you want to make clean slices.
Gently fold the whipped cream into the cream cheese mixture using a spatula. Avoid stirring vigorously—folding helps retain the airy texture.
Once fully combined, spoon the filling onto the chilled crust. Spread it evenly using an offset spatula or the back of a spoon to create a smooth surface.
Refrigerate the cheesecake for at least 6 hours, or overnight if possible. The longer it chills, the better the texture.
Step 3: Prepare the strawberry topping
Wash and hull the strawberries, then slice them in half lengthwise. You can arrange them on top of the cheesecake in concentric circles or any pattern you like once the filling has set completely.
Before adding the strawberries, gently remove the cheesecake from the springform pan and place it on a serving platter. Arrange the strawberries cut-side down across the surface of the cheesecake. This fresh, glossy topping adds both beauty and flavor.
For a glossy finish, you can brush the strawberries with a bit of warmed fruit preserves or a simple glaze made with a teaspoon of sugar dissolved in a tablespoon of water. This step is optional but gives the fruit an elegant shine.
Serving the Cheesecake
Slice the cheesecake with a sharp knife. For the cleanest slices, dip the knife in hot water and wipe it dry between cuts.
Serve chilled, either as-is or with optional extras like chocolate drizzle, whipped cream, or shaved dark chocolate.
Tips for Succes
- Use full-fat cream cheese
Full-fat cream cheese creates a richer, firmer cheesecake. Low-fat versions may result in a softer filling that doesn’t hold its shape as well. - Chill thoroughly
Don’t rush the chilling time. Allowing the cheesecake to set for several hours (preferably overnight) ensures it holds together beautifully when sliced. - Incorporate gelatin carefully
If using gelatin, make sure it’s fully dissolved and not too hot when added to the cream cheese mixture, or it may clump. - Use ripe, sweet strawberries
Fresh strawberries that are ripe and naturally sweet make a big difference in flavor. Avoid underripe berries, as they can be tart and firm. - Make ahead
This cheesecake can be made 1–2 days in advance, making it ideal for parties or events. Just add the fresh strawberries shortly before serving to keep them fresh.
Variations
Chocolate Ganache Layer
Add a chocolate ganache layer under the strawberries for extra indulgence. Simply melt 100g of dark chocolate with 100ml of heavy cream and pour over the cheesecake after it sets. Chill for 30 minutes before adding the strawberries.
Berry Mix Topping
Instead of only strawberries, top your cheesecake with a medley of fresh berries—blueberries, raspberries, blackberries, and strawberries all pair well with the creamy filling and chocolate crust.
Nut Crust
Add finely chopped almonds, hazelnuts, or pecans to the biscuit crumbs for extra flavor and crunch.
Mini Cheesecakes
Divide the crust and filling into individual cups or muffin liners for personal-sized portions—perfect for parties or gifting.
No Gelatin Version
If you prefer a softer texture, skip the gelatin. Just ensure the cheesecake has plenty of chilling time and is served cold for stability.
Storage Instructions
Store the cheesecake in the refrigerator, covered with plastic wrap or a cake dome. It keeps well for up to 4–5 days.
If you want to freeze it, do so without the strawberry topping. Wrap the cheesecake tightly in cling film and aluminum foil, and freeze for up to 1 month. Thaw in the fridge overnight before topping with fresh strawberries and serving.
Why You’ll Love This Cheesecake
This chocolate strawberry cheesecake delivers a stunning presentation with minimal effort. It’s light yet satisfying, rich but not overly sweet, and offers the perfect contrast between a crunchy base, creamy filling, and juicy topping.
Its no-bake nature makes it incredibly approachable—even for beginners—and it can easily be adapted to suit personal tastes. Whether you dress it up for a celebration or keep it simple for an everyday treat, it’s sure to impress.
Final Thoughts
Chocolate and strawberries have always been a match made in dessert heaven. When paired with a silky cheesecake base and a buttery crust, they create something truly special. This cheesecake is not just a recipe—it’s an experience.
Make it once, and it’s likely to become a regular favorite in your kitchen. From family dinners to holiday celebrations, this chocolate strawberry cheesecake fits right in, bringing smiles and sweet memories to every table it graces.
So gather your ingredients, set aside some time, and get ready to create a dessert that’s as rewarding to make as it is to eat. One slice at a time, you’ll be reminded just how good homemade can be.