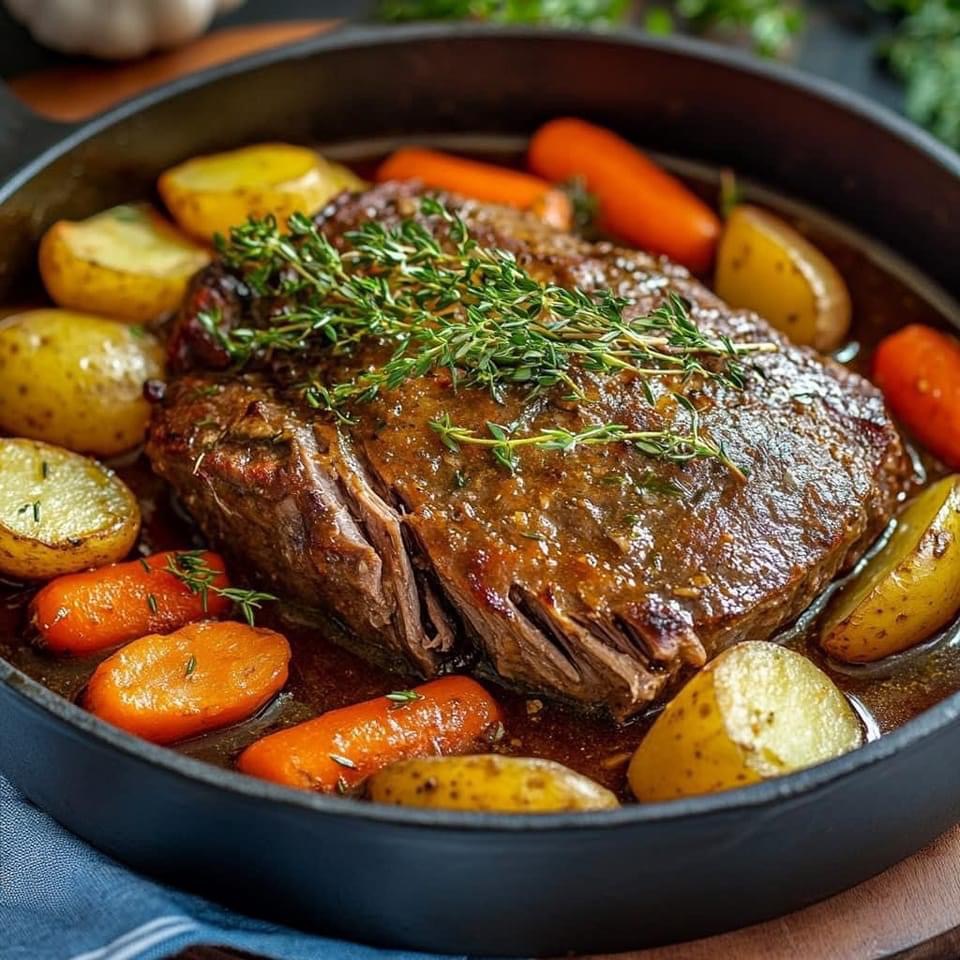
Of course! Welcome to your new favorite comfort food. A perfect pot roast is more than a meal; it’s a centerpiece of warmth and tradition. It’s a dish that seems simple but, when done right, is absolutely sublime—tender enough to pull apart with a fork, deeply flavorful, and surrounded by vegetables that have soaked up all the rich juices.
This ultimate guide will walk you through the why and the how, ensuring your next pot roast is nothing short of spectacular.
The Philosophy of a Perfect Pot Roast
A great pot roast isn’t boiled; it’s braised. This gentle, two-step cooking method is the secret:
- Sear the meat to create a deep, flavorful crust (the Maillard reaction).
- Simmer it slowly in a covered pot with a small amount of liquid, transforming tough connective tissue into rich, melt-in-your-mouth gelatin.
Step 1: Choosing Your Weapon (The Cut of Beef)
Not all roasts are created equal. For braising, you need a tough, well-marbled cut with plenty of collagen.
· Chuck Roast: The undisputed champion. Cut from the shoulder, it’s marbled with fat and connective tissue, which renders down during the long cook to create an incredibly tender and flavorful roast. Look for a well-marbled 3 to 4-pound roast.
· Brisket: Another excellent option, but it’s often leaner and can be a wider, flatter cut. It requires a very long, slow cook.
· Bottom Round/Rump Roast: A leaner option, but can be less forgiving and not quite as tender as chuck.
Verdict: Go for the Chuck Roast.
Step 2: The Ultimate Pot Roast Recipe
Prep Time: 30 minutes | Cook Time: 3-4 hours | Total Time: 3.5 – 4.5 hours
Serves: 6-8
Ingredients:
· 1 (3-4 lb) beef chuck roast
· 2 tbsp olive oil or avocado oil
· 1 large onion, roughly chopped
· 3-4 cloves garlic, minced
· 4-5 carrots, peeled and cut into 2-inch chunks
· 1.5 lbs Yukon Gold or Russet potatoes, peeled and cut into large chunks
· 2 cups beef broth (low sodium preferred)
· 1 cup red wine (like Cabernet Sauvignon or Merlot) optional, but highly recommended
· 2 tbsp tomato paste
· 1 tbsp Worcestershire sauce
· 2-3 sprigs fresh thyme (or 1 tsp dried)
· 2-3 sprigs fresh rosemary (or 1 tsp dried)
· 2 bay leaves
· Kosher salt and freshly ground black pepper
· 2 tbsp all-purpose flour (for the slurry, optional)
Equipment:
· A large, heavy-bottomed pot with a tight-fitting lid (Dutch oven is ideal, but any heavy pot will work)
The Step-by-Step Method
- Preparation is Key (The “Mise en Place”)
· Take the roast out of the refrigerator 30-60 minutes before cooking. Letting it come to room temperature ensures more even cooking.
· Pat the roast completely dry with paper towels. This is non-negotiable for a good sear.
· Generously season all sides of the roast with kosher salt and black pepper.
· Chop all your vegetables. This is your last chance to prep before the active cooking starts.
- The Critical Sear
· Preheat your oven to 325°F (163°C).
· Place your empty Dutch oven over medium-high heat and add the oil. Let it get hot until it shimmers.
· Carefully place the seasoned roast in the pot. DO NOT MOVE IT for a good 4-5 minutes. You’re waiting for a deep brown crust to form.
· Using tongs, sear the roast on all sides, including the edges. This should take about 12-15 minutes total. Remove the roast to a plate and set aside.
- Building the Flavor Base (The Aromatics)
· Reduce the heat to medium. Add the chopped onion to the pot and cook for 4-5 minutes until softened and slightly browned.
· Add the minced garlic and tomato paste. Cook for 1 minute more, stirring constantly, until fragrant.
· If using wine: Pour in the red wine to deglaze the pot. Use a wooden spoon to scrape all the delicious browned bits (the fond) from the bottom of the pot. Let it simmer and reduce by about half.
· If not using wine: Use about 1/2 cup of your beef broth to deglaze.
- The Braise
· Stir in the remaining beef broth and Worcestershire sauce. Bring to a simmer.
· Return the seared roast to the pot, along with any accumulated juices.
· Tuck the thyme, rosemary, and bay leaves around the roast.
· The liquid should come about 1/3 to 1/2 of the way up the sides of the roast. It should not submerge it.
· Bring the liquid to a gentle simmer, then cover the pot with a tight-fitting lid.
· Transfer the pot to the preheated oven. Let the magic happen for 2 hours.
- Adding the Vegetables
· After 2 hours, carefully remove the pot from the oven.
· Place the potato and carrot chunks around the roast, submerging them in the braising liquid as much as possible.
· Cover the pot and return it to the oven for another 1 to 1.5 hours.
- The Doneness Test & Resting
· The roast is done when it is fork-tender. A fork should easily slide in and out, and you should be able to twist a piece off with little effort.
· Once done, carefully remove the pot from the oven. Let the roast rest for at least 20 minutes right in the pot. This allows the muscle fibers to relax and reabsorb the juices, making it even more tender.
- The Final Touch: The Gravy
· Remove the roast and vegetables to a platter and tent with foil.
· For the gravy, you have two options:
· Simple Skim: Use a spoon to skim off excess fat from the surface of the liquid. Then, bring the liquid to a simmer on the stovetop and reduce until it reaches your desired gravy consistency.
· Thickened Gravy: Skim the fat, then bring the liquid to a simmer. Make a slurry by whisking 2 tablespoons of flour with 3 tablespoons of cold water until smooth. Slowly whisk the slurry into the simmering liquid and cook for 3-5 minutes until thickened. Season to taste with salt and pepper.
Pro-Tips for Perfection
· Don’t Peek! Every time you lift the lid, you release precious heat and steam. Trust the process.
· Low and Slow is the Law. A lower oven temperature (300°F-325°F) for a longer time is always better than a higher temperature for a shorter time.
· Underseasoning is the #1 Mistake. Don’t be shy with the salt and pepper on the initial sear. It’s your primary chance to season the meat itself.
· Cut Your Veggies Large. If they’re too small, they’ll turn to mush during the long cooking time.
· The Liquid is Gold. Taste your braising liquid before serving. It should be deeply savory. Adjust seasoning if needed.
Common Mistakes to Avoid
- Not Searing Properly: A pale, un-seared roast will lack foundational flavor.
- Using a Lean Cut: A lean roast like sirloin will become dry and tough.
- Boiling the Meat: You should see barely a bubble when you lift the lid. A vigorous boil will make the meat tough.
- Overcooking the Vegetables: Adding them at the beginning is a recipe for disintegrated potatoes and carrots.
- Skipping the Rest: Cutting in immediately will cause all the beautiful juices to run out.
Now, slice (or pull) that glorious roast, spoon the rich gravy over everything, and enjoy the masterpiece you’ve created. You’ve earned it