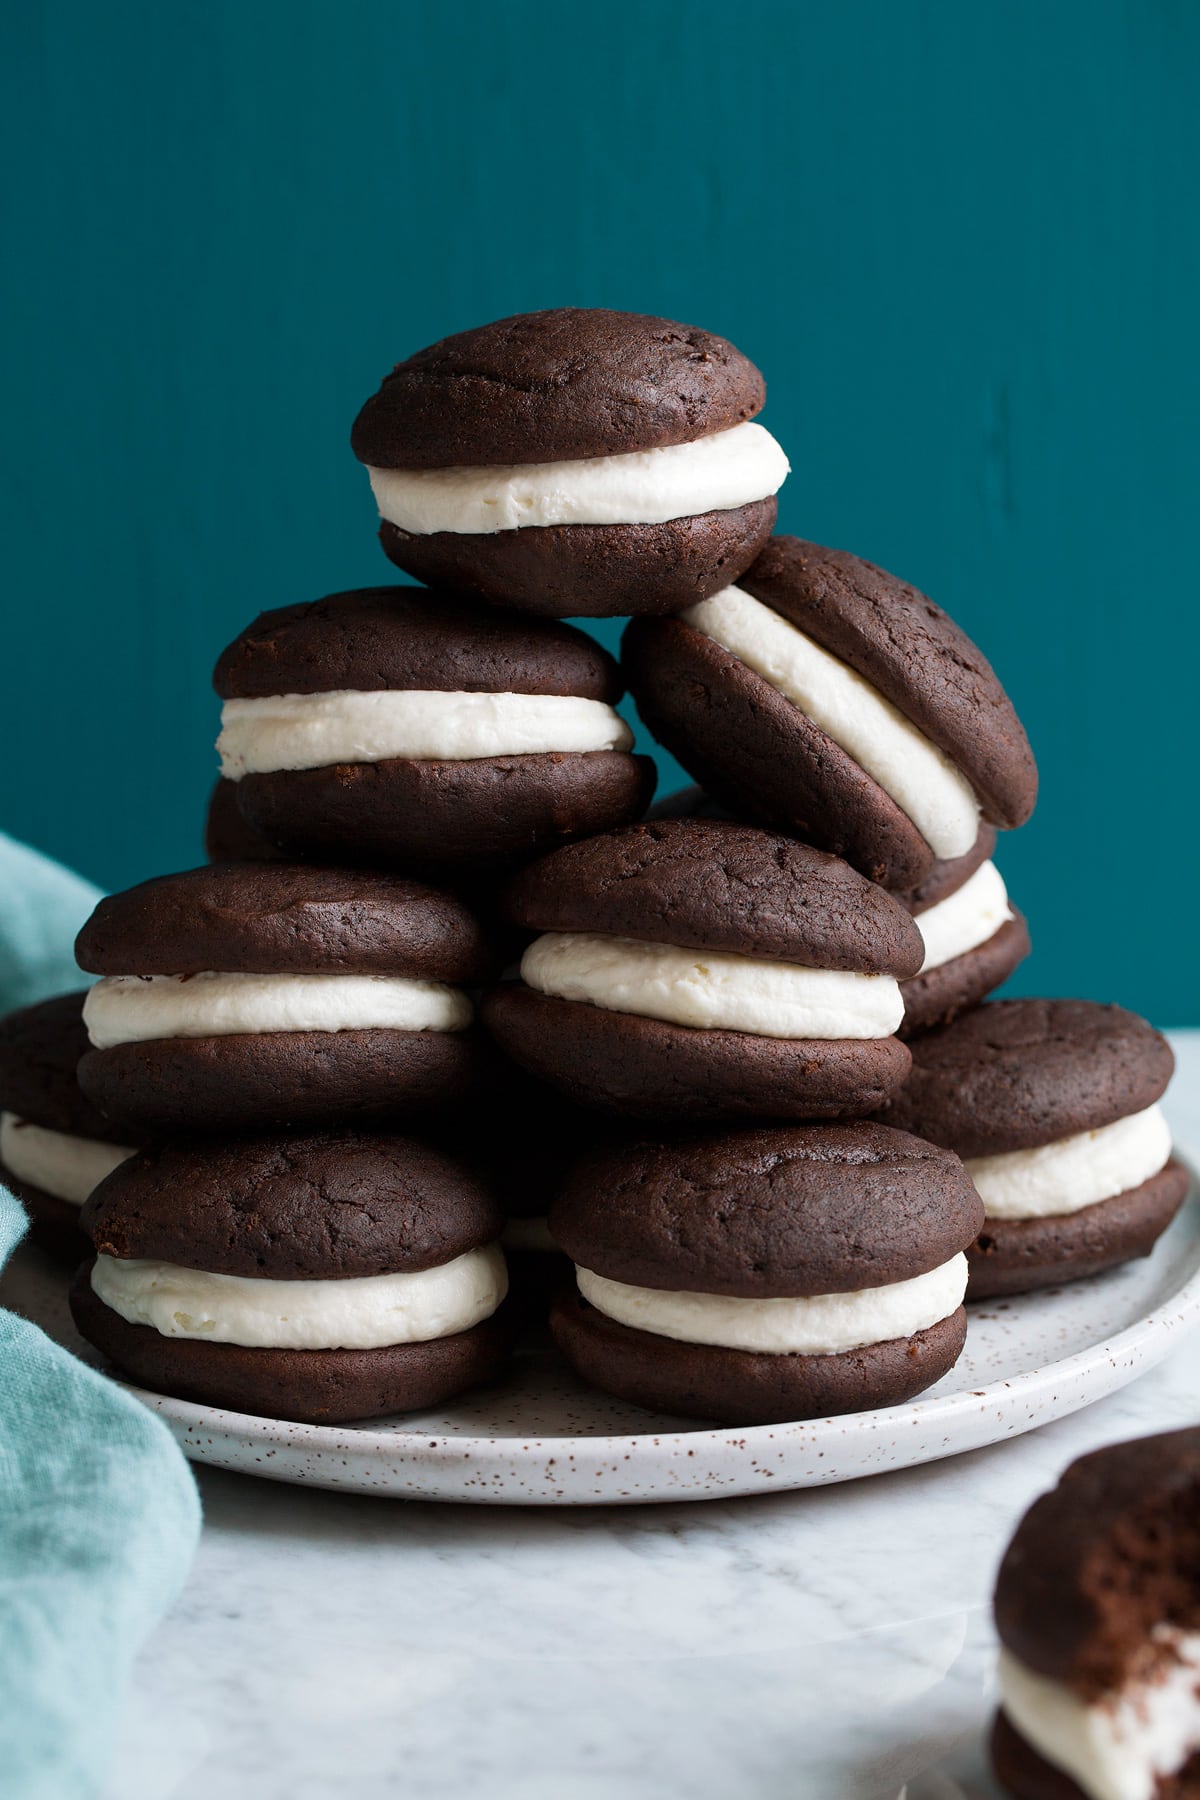
Whoopie pies are a classic American treat with an interesting history, a comforting taste, and a nostalgic charm that continues to win hearts. They sit somewhere between a cake, a cookie, and a pie, which makes them unlike anything else you’ll find at a bakery. Essentially, a whoopie pie consists of two soft, round chocolate cakes sandwiched together with a sweet, fluffy filling. They are rich, portable, and full of homemade comfort.
Some call them “gobs,” others call them “black moons,” but regardless of the name, they are deeply tied to memories of school bake sales, family gatherings, or holiday trays. Traditional whoopie pies have chocolate cake rounds with a vanilla cream filling, but today you’ll find endless variations. Pumpkin whoopie pies filled with spiced cream cheese, red velvet whoopie pies with a tangy filling, or even peanut butter versions have become popular. Still, the chocolate-and-cream original remains the foundation.
The recipe here takes the traditional approach but highlights the reasons behind each ingredient choice, so you can understand how to make them taste just right. With a little patience and the right technique, you’ll end up with soft, pillowy cakes that hold their shape, and a creamy filling that is light but stable.
A Brief History of Whoopie Pies
The story of the whoopie pie traces back to both Pennsylvania and Maine, with both regions claiming the original. In Pennsylvania, they are associated with the Amish and Pennsylvania Dutch, where the treat was packed into lunch pails and called a “gob.” The name supposedly came from coal miners, who thought the shape resembled lumps of coal. In Maine, whoopie pies have been a bakery staple for nearly a century, and in fact, the whoopie pie is the official state treat of Maine.
The origin may never be fully settled, but the cultural significance is undeniable. Whoopie pies represent old-fashioned baking and a link to regional traditions. Today, bakeries across the United States and beyond continue to sell them, and families still bake them at home for special occasions.
Why This Recipe Works
This version strikes a balance between tradition and modern taste. Many old recipes used shortening exclusively in both the cakes and the filling, but butter adds richness and flavor that many people prefer. By using butter in the cake portion and a combination of shortening and butter in the filling, you get the best of both worlds: flavor from the butter and structure from the shortening.
The cookie-cakes themselves are soft and tender thanks to the buttermilk, which also adds a slight tang to offset the sweetness. Cocoa powder provides the chocolate flavor, while brown sugar gives depth and moisture. A simple vanilla filling ties it all together with sweetness and fluff.
Ingredients
For the cakes
• ½ cup unsalted butter, softened
• 1 cup light brown sugar, packed
• 1 large egg
• 2 cups all-purpose flour
• ½ cup unsweetened cocoa powder
• 1 teaspoon baking soda
• ½ teaspoon salt
• 1 cup buttermilk
• 1 teaspoon vanilla extract
For the filling
• ½ cup unsalted butter, softened
• ½ cup shortening
• 1 ½ cups powdered sugar
• 1 teaspoon vanilla extract
• 2 tablespoons milk
Step-by-Step Instructions
Preheat your oven to 350°F (175°C). Line two large baking sheets with parchment paper. This prevents the cakes from sticking and ensures even baking.
Cream the butter and brown sugar together until light and fluffy. This step is crucial because it incorporates air into the mixture, which keeps the cakes soft rather than dense. Add the egg and vanilla, beating well until smooth.
In a separate bowl, whisk together the flour, cocoa powder, baking soda, and salt. This ensures the cocoa and baking soda are evenly distributed. Slowly add the dry mixture to the wet ingredients in batches, alternating with the buttermilk. Begin and end with the dry mixture, mixing gently until combined. Over-mixing can cause the cakes to be tough.
Drop spoonfuls of batter onto the prepared baking sheets, spacing them about two inches apart. Aim for uniform size so the sandwiches pair neatly. Bake for 10 to 12 minutes, or until the cakes spring back when lightly touched. Remove them from the oven and let them cool completely before filling.
To make the filling, beat together butter and shortening until smooth and fluffy. Add powdered sugar slowly, mixing until incorporated. Add milk and vanilla, beating until the filling is light and creamy. The shortening helps stabilize the mixture so it holds its shape once sandwiched.
Spread or pipe the filling onto the flat side of half the cakes, then top with the remaining cakes to form sandwiches. Press gently so the filling spreads evenly to the edges.
Serving Suggestions
Whoopie pies can be served at room temperature or chilled. They are rich and satisfying on their own, but you can also dress them up. Roll the edges in sprinkles or mini chocolate chips for a festive look. Drizzle melted chocolate over the tops for extra indulgence. You could even use flavored fillings, such as peppermint extract for the holidays or peanut butter for a decadent twist.
Because they are handheld and travel well, whoopie pies make excellent bake sale items or party desserts. They can be wrapped individually in parchment or wax paper for easy sharing.
Storage and Freezing
Store whoopie pies in an airtight container at room temperature for up to three days. For longer storage, refrigerate them, but allow them to come to room temperature before serving so the filling softens. They also freeze well. Wrap each individually, then place them in a freezer-safe container or bag. They can be stored in the freezer for up to two months. To enjoy, thaw overnight in the refrigerator.
Variations to Try
The classic chocolate and vanilla version is wonderful, but once you have mastered it, the possibilities are endless.
• Pumpkin whoopie pies: Replace cocoa with pumpkin puree and spices like cinnamon, ginger, and nutmeg. Pair with a cream cheese filling for a seasonal treat.
• Red velvet whoopie pies: Add red food coloring and a touch of vinegar to the cocoa batter for a red velvet twist. Cream cheese filling pairs perfectly.
• Peanut butter whoopie pies: Add peanut butter powder or peanut butter to the batter and filling for a nutty variation.
• Funfetti whoopie pies: Use a vanilla-based batter and add rainbow sprinkles. Great for birthdays and celebrations.
• Mocha whoopie pies: Add espresso powder to the chocolate batter for a subtle coffee flavor.
The Joy of Baking Whoopie Pies at Home
Part of the charm of whoopie pies is that they are rustic and homemade. They are not meant to be perfectly uniform or overly refined. The slight irregularity in shape adds to their character. Making them at home is a rewarding project, whether you are baking for family, for a party, or simply for the joy of having a sweet snack ready in the kitchen.
Children especially love whoopie pies, both for eating and for helping in the kitchen. They can scoop the batter, help mix the filling, or even decorate the edges with sprinkles. The final product feels playful, which is why it has endured for generations.
Final Thoughts
Whoopie pies are more than just a dessert. They are a slice of American food history, tied to traditions and family memories. With their soft chocolate cakes, creamy filling, and endless variations, they have earned their place as a beloved classic. This recipe honors that tradition while offering flexibility for modern kitchens.
Taking the time to bake them is worthwhile. The smell of chocolate cakes baking in the oven, the sight of fluffy cream piped between them, and the first bite into a homemade whoopie pie all combine to create something deeply satisfying. Whether you stick with the classic or experiment with new flavors, the result will always be a little piece of happiness wrapped between two cakes.