No Sugar Biscuit Cream Cake
Simple desserts often carry the most nostalgia and comfort. The No Sugar Biscuit Cream Cake is a perfect example of how minimal ingredients can create a delicious and satisfying treat. Light, creamy, and refreshingly cool, this no-bake cake layers crisp tea biscuits with a sweet cream mixture, resulting in a dessert that tastes far more indulgent than the effort it requires.
What makes this cake especially appealing is its versatility. It can be assembled in minutes, uses everyday pantry staples, and requires no baking or special tools. It’s perfect for busy days, warm weather, or when you need a fuss-free dessert for guests. The name “No Sugar” refers to the fact that no granulated or powdered sugar is used; all the sweetness comes from the sweetened condensed milk, which perfectly balances the creaminess of the whipped topping.
This cake is reminiscent of classic refrigerator cakes or icebox cakes—desserts that rely on time and chilling to transform simple ingredients into something truly magical. After a few hours in the refrigerator, the layers soften and meld together into a silky, spoonable slice of creamy, dreamy flavor.
In the guide below, you’ll learn how to assemble the cake step-by-step, how to customize it to suit different tastes or dietary needs, and how to store and serve it to make the most of every bite.
Ingredients
This no-bake dessert requires just a handful of ingredients, most of which are likely already in your kitchen.
- 2 packs plain tea biscuits (such as Marie or Petit Beurre)
- 2 cups cold heavy cream
- 1 cup sweetened condensed milk
- 1 teaspoon vanilla extract
- Crushed biscuits for topping (optional)
These ingredients come together to create a light, mousse-like filling layered with the subtle crunch of tea biscuits. The result is a cake that feels both nostalgic and modern, elegant yet incredibly easy to prepare.
Step-by-Step Instructions
Step 1: Prepare the whipped cream mixture
In a large mixing bowl, pour in the cold heavy cream. Using a hand mixer or stand mixer, begin whipping the cream on medium-high speed. Continue whipping until soft peaks form—this means the cream should hold its shape but still have a slight bend when the whisk is lifted.
Once soft peaks have formed, add the sweetened condensed milk and vanilla extract. Mix gently to incorporate, then continue whipping until the mixture is thick and fluffy. Be careful not to overwhip—you’re looking for a smooth, stable cream that’s light in texture.
The result should be a rich, airy filling that’s naturally sweet and softly scented with vanilla.
Step 2: Layer the biscuits and cream
Choose a rectangular or square dish for layering—glass or ceramic dishes work beautifully for presentation, especially if you want to show off the layers. A dish roughly 8×8 inches or 9×13 inches works well depending on how many layers you’d like.
Start by placing a single layer of tea biscuits at the bottom of the dish. If needed, break a few biscuits to fit the corners and edges. The goal is full, even coverage.
Spoon a generous layer of the whipped cream mixture over the biscuits. Use a spatula to spread it evenly.
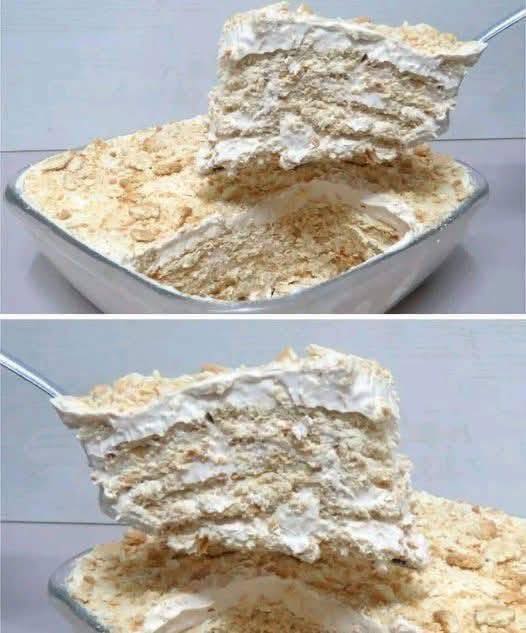
Add another layer of biscuits on top of the cream, then repeat the process, alternating layers of cream and biscuits until all ingredients are used. Finish with a final layer of cream on top.
Step 3: Garnish (optional)
For a simple and appealing finish, sprinkle crushed biscuits over the top of the cake. This not only adds texture but also gives the dessert a lovely, rustic look. You can also dust the top with unsweetened cocoa powder, shaved chocolate, or even a few fresh berries if desired.
Step 4: Chill
Cover the dish with plastic wrap or a lid and refrigerate the cake for at least 4–6 hours, or preferably overnight. Chilling allows the biscuits to soften and absorb the cream, turning them into cake-like layers that cut smoothly and taste luxuriously tender.
Serving Suggestions
When ready to serve, slice the cake into squares or rectangles using a sharp knife. The longer it chills, the cleaner the slices will be.
Serve the cake cold, straight from the refrigerator. It pairs beautifully with a cup of tea or coffee and makes an ideal end to a rich meal. Its lightness also makes it suitable as a midday snack or even a brunch dessert.
Tips for Best Results
- Use very cold cream
Cold cream whips better and faster. Chill your mixing bowl and beaters in the fridge or freezer for 10 minutes before whipping for even better results. - Choose the right biscuits
Tea biscuits like Marie or Petit Beurre work well because of their light texture and mild sweetness. Avoid cookies that are too dense or overly sweet, as they may not soften properly. - Don’t skip the chill time
Time is key to this dessert’s transformation. The biscuits need to rest in the cream mixture to achieve that cake-like texture. - For added structure
If you want a firmer dessert that slices like a cake, whip the cream until stiffer peaks form, but stop before it begins to curdle or turn grainy. - Try flavored variations
Vanilla extract gives a classic touch, but feel free to experiment with almond extract, orange zest, or a touch of espresso powder for variation.
Variations to Try
Chocolate Lover’s Version
Add a layer of chocolate ganache between the cream layers or drizzle melted chocolate over the top for a more decadent dessert. You can also sprinkle cocoa powder between layers for a subtle chocolate flavor.
Fruit-Filled Cake
Layer in thin slices of banana, kiwi, or strawberries between the cream layers for a fruity twist. Fresh berries work especially well with the light cream base.
Coffee-Soaked Biscuits
Dip the tea biscuits briefly in brewed coffee before layering for a tiramisu-like flavor. Just a quick dip will soften the biscuits slightly and add a delightful coffee aroma.
Nutty Crunch
Sprinkle chopped toasted almonds, pistachios, or walnuts between the cream layers or on top of the cake to add a crunchy contrast.
Coconut Cream Cake
Mix in a handful of shredded coconut into the whipped cream mixture and top with toasted coconut flakes for a tropical take.
Storing the Cake
This biscuit cream cake keeps well in the refrigerator for 3 to 4 days. Make sure it’s tightly covered to prevent it from drying out or absorbing other flavors from the fridge.
For longer storage, you can freeze individual portions wrapped in plastic wrap and foil. Allow them to thaw overnight in the refrigerator before serving. The texture may soften slightly after freezing but will still be delicious.
Why This Cake Works
This dessert’s success lies in its simplicity. The ingredients are few and familiar, but they come together in a way that feels elegant and complete. The sweetness is perfectly balanced, with no need for added sugar thanks to the sweetened condensed milk.
The texture is light, creamy, and satisfying—almost mousse-like, with the softened biscuits acting as delicate cake layers. It’s a dessert that feels nostalgic yet refined, humble yet crowd-pleasing.
The no-bake nature of the recipe makes it ideal for summer days or any time you want to avoid turning on the oven. It’s also a great recipe to involve kids or beginner bakers, as the steps are straightforward and forgiving.
Make-Ahead Friendly
This cake is not only easy to make but also perfect for preparing in advance. In fact, it’s even better when made a day ahead, as the flavors meld and the structure firms up beautifully in the refrigerator.
Whether you’re hosting a dinner party, preparing for a holiday meal, or just looking for a reliable dessert to have on hand, this cake offers convenience and deliciousness in equal measure.
Final Thoughts
The No Sugar Biscuit Cream Cake is a wonderful reminder that the best desserts don’t have to be complicated. With only a few ingredients and minimal prep time, you can create a layered, luscious dessert that feels both comforting and special.
Its adaptable nature means you can tailor it to your own preferences or the season, and it’s easy to scale up or down depending on your needs. Whether it’s the star of the show at a celebration or a quiet treat for a weekend indulgence, this cake is sure to find a place in your dessert repertoire.
Keep a pack of tea biscuits and a can of sweetened condensed milk on hand, and you’ll always be ready to whip up a treat that’s simple, sweet, and universally loved.